Friday, April 11, 2014

Mssemen

Mssemen is a very popular Moroccan specialty, the ingredients that go into it are very few and very simple and the quality of the result will depend on the quality of flour and how skillful the Mssemen maker is :-)

Mssemen can be plain (first picture) and served with a little honey or stuffed with a savory filling (beef and onions as in the 2nd picture)


Ingredients:

For the dough:
Flour (high gluten preferred)
Water
pinch of salt

For the folding and cooking process:
Vegetable oil
Fine Semolina
Butter (room temperature)

The amounts are very flexible and depend on how much flour you wish to use, you will focus on the consistency of dough that you are wishing to have in order to know how much water you can add. We are looking for a soft and elastic dough.

Mix the flour salt and water and knead (in machine preferably) until you achieve a smooth and soft dough. Prepare a little bowl with oil, dip your fingers and distribute it on the palm of your hand (so the dough won't stick to them) and form little balls from your dough by squeezing it through your thumb and pointer as shown in the picture:


Pat all the balls with a little oil so they won't dry up and form a little crust


Start spreading each ball into a very thin circle and this will be the key to a flaky Mssemen, you want it to be almost see through

Spread a small layer of softened butter over the circle and sprinkle a generous pinch of semolina over it and start the folding process as shown in the pictures


ok, so now that the Mssemen has been folded over we are going to spread each square into a bigger square just by flattening it with the palm of our hand but this time we don't need it to be way too thin. This is what we're looking for ( I took the picture after I started cooking it)


We heat a skillet on medium fire and we spread small dots of butter on the surface that we're cooking first and then we add some butter on the opposite side. We want to cook the Mssemen until it's golden so we keep flipping on both sides; we don't want to wait until one side is cooked before we flip to the next. We are looking for the result below. Start with a small amount of ingredients until you get used to the process and then you'll be ready to graduate and make bigger amounts :-)  Enjoy!!


Saturday, July 20, 2013

Birthday Cake

I made this cake for my hubby's birthday last month and since he's not a big fan of sugary birthday cakes I always make his sugar free and to be honest there's no way you can tell that it's sugar free, we all enjoyed it including the kids.

I don't make sugar free birthday cakes from scratch, instead I use Pillsbury's sugar free cake mix as it yields a better result. There's something that happens when I try to make a sponge cake using Splenda that doesn't allow it to get as puffy and moist as the ones I make using regular sugar.

You can find the recipe here just use the chocolate cake mix instead of the yellow mix. The chocolate mix tasted so much better especially since I added a handful of finely chopped pecans. I used raspberries this time.


Nice and moist inside

Coconut Shrimp

I made this dish a few days ago and it was enjoyed by the whole family, especially my son who is a big shrimp fan but when I added the crunch of Panko and coconut to it he said that it's the best shrimp he's ever had!

The coconut I used is the unsweetened kind and not to be confused with the variety found in the baking section of most grocery stores which is too sweet to be used for this dish...for my taste anyway.


Ingredients:

Shrimp
Flour+ salt+pepper+paprika
Panko(Japanese bread crumbs) +unsweetened coconut flakes
1 whole egg or more depending on the amount of shrimp

Directions:

Prepare 3 deep dishes as follows:

One with the flour, salt, pepper and paprika
The second dish will have one beaten egg
The third dish will have the mixture of Panko and coconut flakes

Pass the shrimp in the flour mixture then the egg and finally the Panko and coconut mixture and fry in hot oil in a deep pan or fryer until golden brown.

Enjoy!

Friday, April 26, 2013

Roasted Almonds

Almonds are my favorite nuts; I eat them sweet and savory, in baked goods or just on their own...I never say no to almonds no matter what! UNLESS they become a little chewy or stale .The bagged stuff bought from the store tends to loose a lot of the flavor before it gets to us (imagine how long it takes that bag to make it to your shopping cart).

I had once bought a huge bag of roasted almonds from a bulk store thinking that it would be worth it since they are a favorite snack in my house but by the time we consumed half of the bag the second half was rancid so we just tossed it out. I decided to start making my own in smaller amounts that would last for a week and when it's done make a new batch; that way the almonds are always at their freshest. There are many fancy recipes to make different flavors but I always stick to the basic one.


Ingredients:
Almonds
Salt
Water

Directions:

Line a baking sheet with some aluminum foil (you will love me at clean up time) in a bowl pour enough water to completely wet all your almonds and this will depend on the amount you're making but the goal is NOT to soak each almond but rather wet your whole batch in a uniform manner. Add Salt to your water (depends on your preference of how salty you want the almonds to be). That is it! Almonds wet with some salted water and spread in one layer on the baking sheet. They bake in a 400 degree oven for 20 to 30 minutes, keep checking every 10 minutes to move the almonds around so all of them roast at the same time.

Enjoy!

Tuesday, April 16, 2013

Moroccan Shrimp over Rice

I am a big seafood lover but shrimp is a bit of an exception for me; I don't hate it but i don't really love it the way I like fish or oysters...This recipe is one of very few that transform shrimp to something I really enjoy. I prepare it using shrimp that's still in the shell for two reasons; it produces a lot of flavorful juices for the sauce and it's so much fun to get messy with it when it's served. Of course you can take the shells off before cooking if you're serving it to guests.


Ingredients:

20 jumbo shrimps
2 minced garlic cloves
3 tbsp chopped cilantro
1 tbsp butter
salt/pepper
1/2 teaspoon cumin
1/2 teaspoon paprika
1 tbsp olive oil
Saffron
4 to 5 tbsp water

Rice (according to preference)

Directions:

Cook the rice in some salted water until soft and let it drain. Save on the side
In a sauteing pan add shrimp and all ingredients (except for rice) and cook on a low heat until shrimp is cooked. Don't forget to add the water in the beginning of the cooking process and if more is needed add a little at a time, the goal is to have cooked shrimp and enough sauce left for the rice.

Remove the cooked shrimp from the pan and set aside, add your rice to the pan and mix around until it absorbs all the sauce that is left behind.

Serve Shrimp over rice and enjoy!!

Friday, March 8, 2013

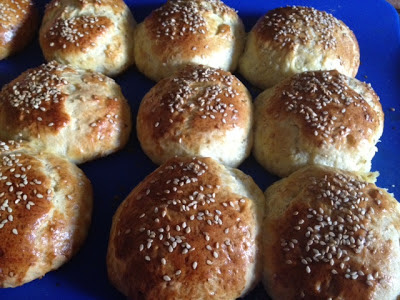
Krachel or Moroccan Brioche

I had made these Krachel rolls a while ago but haven't had the chance to post the recipe.
These are sweet rolls that you wouldn't serve with a meal like a regular roll; they are meant to be served for breakfast with some jam and a nice cup of coffee or as a snack. the aroma that the anise and sesame seeds give the roll, transport you to the spice and seeds markets in Marrakesh. The brioche like texture is irresistible especially when the rolls are right out of the oven.You don't have to add the sesame seeds and anise seeds if you're not a fan.


Ingredients:
1 tbs yeast diluted in 6 tbs of warm milk
3 cups of flour
1/2 tsp of salt
6 tbs of sugar
4 eggs
2 sticks of butter at room temperature
1 tbs anise seeds (toasted on a pan to bring out aroma)
1 egg+1tbs water for egg wash
some sesame seeds to sprinkle

Directions:

Add the yeast and milk mixture, salt nd anise seeds to the flour, mix and add the sugar. Add the 4 eggs one by one mix a little and add the 2 sticks of butter little by little until all combined. A standup mixer will be perfect for this recipe, otherwise just mix with your hands really well until you achieve a very soft dough.

Let the dough rest for 1 hour until it doubles in size and then flatten it on a smooth surface and start making little rolls with your hands and place on a butterd/floured cookie sheet cover with a clean cloth and let them rise for 1 hour.

Brush with some egg wash and sprinkle with sesame seeds (if desired) and bake in a 360 degrees oven for 20-30 minutes.

Enjoy!!

Saturday, November 17, 2012

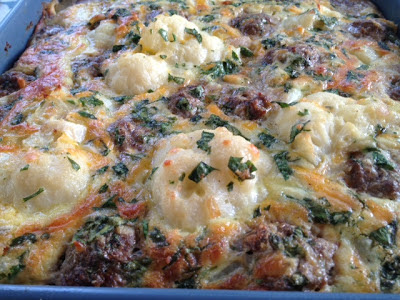
Cauliflower and Meatballs Gratin

This is another dish that I came up with while trying to use up leftovers. I had some seasoned uncooked hamburger meat in my fridge from making my spaghetti sauce with meatballs the night before and I had to use it before it spoiled. The only problem was that I didn't have enough to make a meal out of it so I knew that it needed to be stretched by mixing it with something else and then cauliflower gratin came to mind!

The meatballs need to be about as small as a big grape so that they can be cooked to a safe temperature by the time the whole gratin is ready. The meatballs have my usual seasoning (minced onion/chopped cilantro/cumin paprika pepper and salt) but you can use your own seasoning if you prefer.

The recipe for the cauliflower gratin can be found here just add your seasoned meatballs to the cauliflower before pouring the egg and cream mixture evenly.


Enjoy!

Friday, October 19, 2012

Poor Man's Cookies (Ghribat Zit)

So the name is not a real translation for what the cookies are really called (oil cookies) but that is what I feel they should be called because this is the cheapest cookie anyone could make. It's funny how kids see things so much differently than adults; I remember that we would never have these at home because my mom would make just about any other type of cookies but these...I guess they were considered an "unclassy" cookie to offer to your guests maybe?! I don't know but I feel like it would be the equivalent of offering your guests some twinkies with their coffee :-) I loved them anyway!!


These cookies used to be sold in every corner grocer in Casablanca at least, I am not sure about the other regions but I know that it's not common any more and now I make my own once in a while for childhood memories' sake! The ingredients are in every kitchen's pantry.


Ingredients:

4 cups of flour
1 cup of sugar
1 cup of canola or vegetable oil
1/2 teaspoon of baking powder
1/2 teaspoon of vanilla extract
Small pinch of salt
Almonds or chocolate chips for decorating (optional)

Directions:

Mix all the ingredients with the tips of your fingers without kneading or over mixing...same way you would proceed with a pie crust (this is key to a crumbly texture). form a ball and let it rest for 15 minutes wrapped in plastic wrap
Form little balls and bake them in a 325 degree oven for 15 to 20 minutes. It should not change color all over only become a little golden from the bottom.
Let cool before serving.

Sunday, August 19, 2012

Swedish baked potato

If there's one thing I love about cooking it would be that you can never stop improving; your signature dish can get even better when you find a new little twist to add to it, if you are more of a cook than a baker or vice versa then you can correct that with a little practice.

Another aspect I enjoy about cooking would be the variety that you can bring into your kitchen when you open it up to other world cuisines...It really is sad when a skilled cook limits himself in the kitchen because he doesn't have the confidence or open mindedness to try new exciting things. Different can be good, different can be delicious!

I made these Swedish baked potatoes after I had seen them on google images the other day and let me tell you...This is one elegant baked potato that makes for a great presentation.


Ingredients

Baking potatoes
butter
salt
pepper
paprika
garlic powder
olive oil

Directions:

Mix the softened butter with the spices (you can use any spices you like)
Wash the potatoes and dry them, cut a thin layer from the bottom so that they can sit flat
cut each potato into thin sections all the way across without going all the way to the bottom (You need to keep them attached see pic)
add the butter mixture between the sections
Drizzle with a little olive oil and bake at a 425 degree oven for 45-50 minutes or until the inside is tender.

Enjoy! 


Eid cookies 2 and our Eid breakfast

Today is Eid al Fitr; the celebration of the end of the fasting month of Ramadan. I had posted some pictures of the cookies I made to celebrate and here are some more that I made yesterday.
I've also included pictures of ou breakfast table as it is the most important meal of this celebration... having breakfast again for the first time after one month is something worth celebrating you know! :-)

I will be posting the recipes for Eid cookies as soon as I get out of my sugar coma LOL

On the table, semonlina pancakes/mssamen/cookies, cookies and more cookies :-)


                                                              chocolate cookies

                                                               Chewy almond cookies        
Pecan cookies and chocolate pecan cookies (Sugar free)

Enjoy!

Friday, August 17, 2012

Eid cookies

After fasting for a whole month from dawn to dusk Ramadan is almost over and the Eid celebrations will start in a couple of days to mark the end of this big religious event.
Eid is a truly loved holiday by the big and small; the adults feel spiritually fulfilled and excited to go back to the regular rythm of life that they found a new appreciation for. Children are given money, new clothes and are happy to wake up to the ultimate breakfast...Cookies!! lol a big collection of cookies and semolina pancakes and other delicacies are served with mint tea and coffee to celebrate. That was the cultural bit of the day :-)

I am sharing with you here some cookies  that I've prepared for Eid, I will be posting the recipes on a later time.

Snow balls with shredded coconut


Almond cookies and sesame cookies


Coconut semolina cookies


Flour cookies or Moroccan shortbread cookies


My kids' favorite cookies because they can use the cookie cutters :-)

Enjoy!

Thursday, August 9, 2012

Potato gratin

Easy and very presentable when entertaining; that would sum up this potato gratin. I love to find ideas of dishes and appetizers that can be either made ahead of time or prepped for and only assembled at the last minute. I cut the potatoes and cook them ahead of time so the only thing I need to do is add the egg/cream mixture and pop them in the oven right before serving.


Adorable heart shaped gratin

Ingredients:

3 Potatoes
1 chopped onion
2 eggs
1/4 cup of heavy cream
1 tablespoon chopped cilantro
Salt/Pepper
2 tablespoons shredded cheese+a handful for sprinkling on top

Directions:

Peel and cut the potatoes into small cubes, cook them in salted water until tender then let them drain and cool down.
Sautee the chopped onion in a little oilve oil and let it cool down completely.
Mix the eggs, cream, cilantro, salt/pepper, shredded cheese and cooled onion.
Distribute a first layer of potaotes in the bottom of the mold and pour some of the eggs mixture over it, then spread a second layer and cover with the remaining mixture.
Cook in a 375 degree oven for 20-30 minutes. Once cooked, add shredded cheese to the top and turn the oven off until the cheese is melted.

Important: I have used a silicone mold because it's easier to take the gratin out of it.

Enjoy!


Sunday, August 5, 2012

Beef briwates

The term "briwates" refers to a number of appetizers and desserts that use a very thin pastry sheet filled with a sweet or savory mixture and shaped into either cigars, rectangles or little triangles.  The sky is the limit when it comes to the types of filling you can use but the most known ones are almond briwates, beef briwates and shrimp briwates.
These beef briwates were baked but they are traditionally fried; of course they would be even tastier when fried just like anything else lol.
 I suggest baking them for a beginner until you master the folding part because you'll have to have the pastry sheet tightly wrapped around the filling so it doesn't open once it hits hot oil. I bake them to keep the amount of fried food under control.


Ingredients:
Spring roll sheets
Thin chinese rice noodles
Hamburger meat
Green peppers
Cilantro
Onion
Salt/pepper/paprika/cumin
Melted butter and an egg yolk for the folding part.

Directions:
The mixture doesn't have to be what I listed; if you don't like peppers don't use them and you can use as little or as much meat as you want. Taste your mixture (once the meat is cooked) and season to your taste.

Cook the rice noodles by placing them in a bowl full of boiling water and let them soak for about 5 minutes. Drain and cut into small pieces.

Add 2 tablespoons of oil to a hot skillet and add the green pepper cut into very small cubes. Add the finely chopped onion. Once the pepper and onion are tender add cilantro and all the other seasonings. Mix quickly and add your hamburger meat in chunks.
Using a wooden spatula work quickly to make sure that the meat is combined with all the other ingredients and that there are no big chunks of meat.
Once the meat is cooked add the noodles and mix very well. Let the mixture completely cool.

Grab your spring roll sheet, and cut it to the size of your preference. I like my cigars medium sized so I cut 2 inches off the width. Brush the sheet with melted butter (This will make it crispy once cooked) place an amount of the mixture in the center and fold as shown in the picture

Remember to fold the sides so that they cover the mixture.

Add egg yok to seal the bottom, brush each cigar with melted butter and bake at a 400 degree until golden brown and crispy.

Enjoy!

Friday, August 3, 2012

Sweet rice

This sweet rice is a favorite in my house and is super easy to make, it is best when served just a little warm or at room temperature.


Ingredients:

Rice
Sugar
Cinnamon
Orange blossom water
Butter

Directions:

Cook rice until tender, drain it. Heat up a little butter in a skillet, add some sugar/cinnamon/orange blossom water. Add the rice and move it around the skillet for a few minutes to coat every grain in the sweet butter mixture.
pour in a mold and flip on a plate, decorate with some more cinnamon and powdered sugar. You can add some soaked raisins to the rice mixture.

Enjoy!

Thursday, August 2, 2012

Apple almond tart

The combination of warm apples and almonds is one of my favorites so I was very hesitant to make this dessert because I knew that things could get ugly very quickly :-) but I was a good girl and didn't eat it all at once lol
This tart keeps very well in the fridge for 3 days, just heat it up and enjoy it for breakfast or as a snack...The whole family enjoyed this treat. I made two versions of it; one shaped as a turnover and one as an open faced tart. Both were great but I leaned towards the tart because you don't waste the puff pastry as you would when cutting out the round shapes for the turnovers.

I was able to only make four medium turnovers out of one puff pastry sheet so I chose to use the second sheet in its entirety for the open faced tart. Tip: If you prefer the turnovers, use the pastry sides by sprinkling them with Cinnamon and sugar and shaping them into twists. (The kids didn't give me a chance to take a picture of those lol)


Ingredients:

Almond paste (finely ground blanched almonds+sugar+cinnamon+enough butter to make it a firm paste)
Mascarpone cheese (Use half the amount of almond paste)
2 puff pastry sheet
Apples softened in a little butter, sugar and Cinnamon in a skillet.


Directions:

Mix the Mascarpone cheese with the almond paste (taste for sweetness). Keep your thawed puff pastry sheet in the fridge until the last minute so it's still cold and easy to handle when you work with it.

Unfold the sheet on a floured surface, poke the dough all over using a fork, spread the almonds mixture and top with an even layer of the softened apples.

Bake in a 400 degree oven until golden brown on the bottom.

Enjoy!